이어서 Google 소셜 로그인에 대해서 포스팅해보겠습니다. 이전 포스팅에서 구글 클라우드 프로젝트 생성 후 클라이언트 ID , 클라이언트 보안 비밀번호 토큰 값을 생성했습니다.
그렇다면 생성한 프로젝트를 자바에서 어떻게 코드에 넣어서 적용할까??
먼저 일반적인 절차에 대해서 정리해보겠습니다.
- Google API Console에서 프로젝트를 생성하고, OAuth2.0 클라이언트 ID를 발급받습니다.(이전 포스팅에서 생성했다.)
- 백엔드 서버에서 사용자 인증을 처리하기 위해 Spring Security 등의 보안 프레임워크를 설정합니다. 이를 통해 사용자 인증 및 인가를 관리할 수 있습니다. (Security Config 파일에 추가한다.)
- 로그인 링크를 클릭하면 사용자는 구글 로그인 페이지로 이동하게 됩니다. 사용자는 구글 계정 정보를 입력하여 인증을 수행합니다.
- 구글은 사용자에게 인증 코드를 발급하며, 사용자가 애플리케이션으로 돌아오면 인증 코드를 전달합니다.
- 백엔드 서버는 인증 코드를 사용하여 구글 API에 요청을 보내고, 액세스 토큰을 받아옵니다.
- 받아온 액세스 토큰을 사용하여 사용자 정보를 가져올 수 있습니다. 이 정보를 기반으로 사용자를 인증하고 세션 등의 처리를 수행합니다.
예제 코드로는 이전 포스팅에서 알아봤던 Spring Security를 사용해서 구글 로그인을 할 수 있게 해 보겠습니다.
(Spring Security를 알아보고 계신 분들은 아래 포스팅을 참고해 보시면 좋을 거 같습니다.)
[ Spring ] Security 개념
Security란? 시큐리티(Security)는 소프트웨어 시스템의 보안과 관련된 개념입니다. 주로 웹 애플리케이션, 모바일 앱, 서버 등에서 사용되며 사용자 인증(Authentication), 권한 부여(Authorization), 데이터
drg2524.tistory.com
[ Concept ] Authentication 객체
시큐리티에 대해서 공부하던 중 Authentication 객체를 사용해서 인증 과정을 알아가고 있습니다. 처음 사용해 보는 객체인 만큼 개념에 대해서 알아두고 메모해두기 위해 포스팅을 해보겠습니다. A
drg2524.tistory.com
application.properties / yml 설정
구글 소셜 로그인을 구성하려면 먼저 application에 클라이언트 ID 및 클라이언트 시크릿 정보를 설정해줘야 합니다.
properties 설정은 다음과 같습니다.
< properties >
spring.security.oauth2.client.registration.google.client-id=<your-client-id>
spring.security.oauth2.client.registration.google.client-secret=<your-client-secret>
yml 형식으로 설정하시는 분들은 아래 코드로 적용하시면 됩니다.
< yml >
  security:
    oauth2:
      client:
        registration:
          google:
              client-id: 112064972400-pod06u893e417hl8pg7oh7oi2oavlqt3.apps.googleusercontent.com
              client-secret: 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
              scope:
                - email
                - profile
TIP ) yml 형식으로 설정하시는 분들은 코드 줄 형식을 잘 맞춰줘야 합니다. 예를 들면
security:
oauth2:
client:
registration:
google:
client-id: 112064972400-pod06u893e417hl8pg7oh7oi2oavlqt3.apps.googleusercontent.com
client-secret: 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
scope:
- email
- profile
위 설정 코드처럼 코드 줄 라인이 안 맞으면 에러가 발생하거나, 원활한 기능 동작을 못합니다.
Spring Security
설정을 끝내면 Spring Security 구성 파일에 구글 로그인을 위한 설정을 추가합니다.
@Configuration
@EnableWebSecurity
public class SecurityConfig extends WebSecurityConfigurerAdapter {

    @Override
    protected void configure(HttpSecurity http) throws Exception {
        http
            .authorizeRequests()
                .antMatchers("/").permitAll()
                .anyRequest().authenticated()
                .and()
            .oauth2Login()
                .loginPage("/login")
                .defaultSuccessUrl("/dashboard")
                .and()
            .logout()
                .logoutUrl("/logout")
                .logoutSuccessUrl("/")
                .and()
            .csrf().disable();
    }
}
위 코드처럼 Security 파일에 설정을 추가하면 동작을 합니다. 하지만 위 코드는 되도록이면 사용하는 걸 권장하지 않습니다.
왜 그럴까?? 그 이유는 상속(extends) 받은 WebSecurityConfigurerAdapter 는 Spring Security 5.7.0-M2 에서는 사용자가 구성 요소 기반 보안 구성으로 이동하도록 권장하므로 더 이상 사용되지 않습니다...
(실제로 시큐리티 파일을 구성해서 로그인 기능으로 연습을 해봤지만, 제대로 동작이 되지 않았습니다.)
그럼 어떻게 시큐리티를 사용해야 할까요?
그건 바로 Spring Security 5.4부터 Bean을 생성하여 구성하는 기능이 있습니다.
SecurityFilterChain 을 Bean으로 등록해서 사용하시면 됩니다.
SecurityFilterChain은 Spring Security에서 요청을 처리하는 데 사용되는 필터 체인을 나타내는 인터페이스입니다. 이 인터페이스는 Spring Security 필터들의 연결을 정의하고, 각각의 필터가 어떤 동작을 수행하는지 결정합니다.
자세한 정보는 Spring.io 홈페이지에서 확인할 수 있습니다.
Spring Security without the WebSecurityConfigurerAdapter
In Spring Security 5.7.0-M2 we deprecated the WebSecurityConfigurerAdapter, as we encourage users to move towards a component-based security configuration. To assist with the transition to this new style of configuration, we have compiled a list of common
spring.io
그렇다면 코드로는 어떻게 적용할까요?
Security 파일에 상속시킨 WebSecurityConfigurerAdapter 를 지우고,
예제에서 사용한 "configure()" 메서드를 SecurityFilterChain으로 교체해 줍니다.
아래 코드는 Security 설정 파일에 SecurityFilterChain을 Bean 등록시켜서 적용한 코드입니다.
package com.cos.security1.config;

//1.코드받기(인증) 2.엑세스토큰(권한)
// 3.사용자 프로필 정보를 가져오고
// 4-1. 그 정보를 토대로 회원가입을 자동으로 진행시키기도 함.
// 4-2. (이메일,전화번호,이름,아이디) 쇼핑몰->(집 주소), 백화점몰 --> (vip등급, 일반등급) 등 추가적인 구성이 필요하다.

import com.cos.security1.config.oauth.PrincipalOauth2UserService;
import org.springframework.beans.factory.annotation.Autowired;
import org.springframework.context.annotation.Bean;
import org.springframework.context.annotation.Configuration;
import org.springframework.security.config.annotation.method.configuration.EnableGlobalMethodSecurity;
import org.springframework.security.config.annotation.web.builders.HttpSecurity;
import org.springframework.security.config.annotation.web.configuration.EnableWebSecurity;
import org.springframework.security.web.SecurityFilterChain;

@Configuration
@EnableWebSecurity // 스프링 시큐리티 필터가 스프링 필터체인에 등록이 된다.
@EnableGlobalMethodSecurity(securedEnabled = true, prePostEnabled = true)
//secured 어노테이션 활성화 , preAuthorize 어노테이션 활성화
public class SecurityConfig { // 스프링 필터 역할

    @Autowired
    private PrincipalOauth2UserService principalOauth2UserService;

    @Bean
    public SecurityFilterChain filterChain(HttpSecurity http) throws Exception {
        return http
                .csrf().disable()
                .authorizeRequests()
                .antMatchers("/user/**").authenticated() // 인증만 되면 들어갈 수 있는 주소!!
                .antMatchers("/manager/**").access("hasRole('ROLE_ADMIN') or hasRole('ROLE_MANAGER')")
                .antMatchers("/admin/**").access("hasRole('ROLE_ADMIN')")
                .anyRequest().permitAll()
                .and()
                .formLogin()
                .loginPage("/loginForm")
                .loginProcessingUrl("/login")// login 주소가 호출이 되면 시큐리티가 낚아채서 대신 로그인을 진행해준다.
                .defaultSuccessUrl("/")
                .and()
                .oauth2Login()
                .loginPage("/loginForm") //구글 로그인이 완료된 뒤의 후처리가 필요함. Tip. 코드x,(액세스토큰 + 사용자프로필정보 o)
                .userInfoEndpoint()
                .userService(principalOauth2UserService)
                .and().and().build();

    }
}
'HttpSecurity' 객체를 통해 보안 규칙을 정의하고, 'authorizeRequests()' 메서드로 요청에 대한 접근 권한을 설정합니다.
SecurityFilterChain은 필터의 연결 순서를 정의하기 위해 사용되며, 각각의 필터는 요청에 대한 처리를 담당합니다.
인증 필터, 인가 필터, 로그인 필터, 로그아웃 필터 등 다양한 종류의 필터들이 SecurityFilterChain에 구성되어 보안 작업을 수행합니다.
Controller
Security 설정을 끝냈다면 로그인 처리를 위한 컨트롤러를 생성해 줍니다.
package com.cos.security1.controller;

import com.cos.security1.config.auth.PrincipalDetails;
import com.cos.security1.model.User;
import com.cos.security1.repository.UserRepository;
import lombok.RequiredArgsConstructor;
import org.springframework.security.access.annotation.Secured;
import org.springframework.security.access.prepost.PreAuthorize;
import org.springframework.security.core.Authentication;
import org.springframework.security.core.annotation.AuthenticationPrincipal;
import org.springframework.security.core.userdetails.UserDetails;
import org.springframework.security.crypto.bcrypt.BCryptPasswordEncoder;
import org.springframework.security.oauth2.core.user.OAuth2User;
import org.springframework.stereotype.Controller;
import org.springframework.web.bind.annotation.GetMapping;
import org.springframework.web.bind.annotation.PostMapping;
import org.springframework.web.bind.annotation.ResponseBody;

@Controller // View를 리턴하겠다!!
@RequiredArgsConstructor
public class IndexController {

    private final UserRepository userRepository;
    private final BCryptPasswordEncoder bCryptPasswordEncoder;

    //스프링 시큐리티는 자기만의 시큐리티 세션을 갖고 있다. DI를 주입하려면 Authentication 객체가 꼭 필요하다.

    //Authentication 안에 들어갈 수 있는 타입은 딱 두개다.
    // UserDetails -> 일반 로그인
    // OAuth2User -> facebook, sns 등 OAuth 타입으로 로그인
    // 그럼 컨트롤러에 사용하려면 어떻게 해야할까?
    // 부모 클래스를 만들어서 상속 시켜주면 된다.

    @GetMapping("/test/login")
    public @ResponseBody String testLogin(Authentication authentication,
    @AuthenticationPrincipal PrincipalDetails userDetails){ // DI(의존성 주입)
        // @AuthenticationPrincipal=> 세션 정보에 접근할 수 있게 해준다.
        // PrincipalDetails로도 세션 정보에 접근할 수 있다. 왜냐면 UserDetails를 implements 했기 때문에,
        // 그렇다면 getUsername()으로 호출하는게 아니라 getUser()로 호출해줘야 한다.
        System.out.println("/test/login ======================");
        PrincipalDetails principalDetails = (PrincipalDetails) authentication.getPrincipal() ;
        System.out.println("authentication = " + principalDetails.getUser()); // authentication.getPrincipal() 리턴 타입 => Object

        System.out.println("userDetails = " + userDetails.getUser());
        return "세션 정보 확인하기";

    }
    @GetMapping("/test/oauth/login")
    public @ResponseBody String testOAuthLogin(Authentication authentication , @AuthenticationPrincipal OAuth2User oAuth){ // DI(의존성 주입)

        System.out.println("/test/oauth/login ======================");
        OAuth2User oAuth2User = (OAuth2User) authentication.getPrincipal() ;
        System.out.println("authentication = " + oAuth2User.getAttributes()); // authentication.getPrincipal() 리턴 타입 => Object

        System.out.println("oAuth2User = " + oAuth.getAttributes());


        return "OAuth 세션 정보 확인하기";

    }

    //localhost:8080/
    //localhost:8080
    @GetMapping({"","/"})
    public String index(){

        //머스테치 기본폴더 src/main/resources/
        //뷰리졸버 설정 : templates (prefix), .mustache(suffix) 생략가능!!
        return "index";
    }
    //OAuth 로그인을 해도 PrincipalDetails
    //일반 로그인을 해도 PrincipalDetails
    @GetMapping("/user")
    public @ResponseBody String user(@AuthenticationPrincipal PrincipalDetails principalDetails){
        System.out.println("principalDetails = " + principalDetails.getUser());
        return "user";
    }
    @GetMapping("/admin")
    public @ResponseBody String admin(){
        return "admin";
    }
    @GetMapping("/manager")
    public @ResponseBody String manager(){
        return "manager";
    }
    // 스프링 시큐리티 해당주소를 낚아채버리네요!! - SecurityConfig 파일 생성 후 작동 안함.
    @GetMapping("/loginForm")
    public String loginForm(){
        return "loginForm";
    }
    @GetMapping("/joinForm")
    public String joinForm(){
        return "joinForm";
    }

    @PostMapping("/join")
    public String join(User user){
        System.out.println("user = " + user);
        user.setRole("ROLE_USER");
        // 이유는 패스워드가 암호화가 안되었기 때문에
        String rawPassword = user.getPassword();
        String encPassword = bCryptPasswordEncoder.encode(rawPassword);
        user.setPassword(encPassword);
        userRepository.save(user); // 회원가입 잘됨. 비밀번호 : 1234 => 시큐리티로 로그인을 할 수 없다.
        return "redirect:/loginForm";
    }

    @Secured("ROLE_ADMIN") //하나만 걸고 싶다면 Secured 만 하면 된다.
    @GetMapping("/info")
    public @ResponseBody String info(){
        return "개인정보";
    }

    @PreAuthorize("hasRole('ROLE_MANAGER') or hasRole('ROLE_ADMIN')") //여러개 걸고 싶다면?
    @GetMapping("/data")
    public @ResponseBody String data(){
        return "데이터정보";
    }


}
HTMl
마지막으로 로그인 페이지를 간단하게 생성합니다.
<!DOCTYPE html>
<html lang="en">
<head>
    <meta charset="UTF-8">
    <title>로그인 페이지</title>
</head>
<body>
<h1>로그인 페이지</h1>
<hr/>
<form action="/login" method="post">
    <input type="text" name="username" placeholder="Username"/> <br/>
    <input type="password" name="password" placeholder="Password"/> <br/>
    <button>로그인</button>
</form>
<a href="/oauth2/authorization/google">구글 로그인</a><!--주소는 고정이기 때문에 마음대로 바꿔 적을 수 있는게 아니다.-->
<a href="/joinForm">회원가입을 아직 하지 않으셨나요?</a>
</body>
</html>
여기서 주의할 점은 '구글 로그인' 버튼의 경로는 처음에 Google 클라우드에서 생성했던 프로젝트 주소이므로 고정입니다. 그래서 마음대로 바꿔 적을 수 있는 게 아닙니다.
코드가 제대로 동작하는지 마지막으로 테스트를 진행합니다.
진행 순서는 다음과 같습니다.
- 애플리케이션을 실행하고 브라우저에서 'http://localhost:8080/login'에 접속합니다.
- 구글 로그인 링크를 클릭하여 구글 계정으로 로그인합니다.
- 로그인이 성공하면 사용자가 가고 싶어 하는 페이지로 이동합니다.
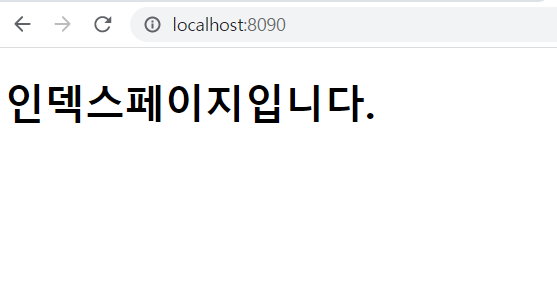
저는 8080 포트번호를 사용하고 있어서 초기에 포트번호를 8090으로 설정했습니다.
다음으로 경로에 /user 를 추가해 보겠습니다.
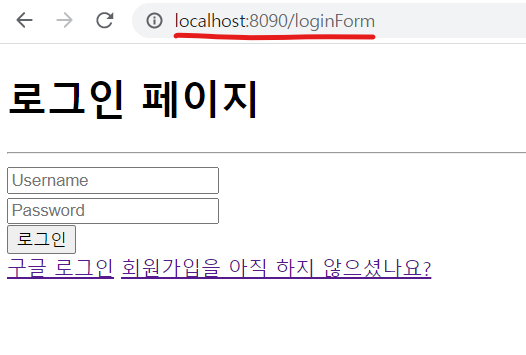
경로에 /user 를 추가하니까 Security가 낚아채서 설정한 loginForm으로 안내해 줍니다.
일반 로그인을 하면 user 페이지로 이동할 수 있습니다. 하지만 오늘 포스팅은 소셜 로그인에 대해서 알아보는 시간이기 때문에 '구글 로그인' 버튼을 클릭해서 로그인을 진행합니다.

'구글 로그인 ' 버튼을 클릭하니까 google 로그인 페이지로 이동했습니다. 계정을 선택해서 결과를 확인합니다.
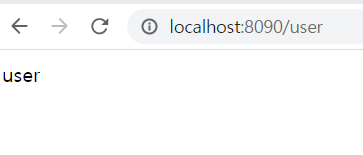
실행 결과 처음에 설정한 /user 페이지로 이동하는 걸 확인할 수 있습니다.
TIP )
여기서 꿀팁을 드리자면 Spring Security는 기본적으로 logout 기능이 추가가 되어있습니다.
경로에 /logout을 지정해서 실행하면 LoginForm으로 이동합니다.

마치며
오늘은 Spring Security를 기반으로 구글 소셜 로그인에 대해서 알아봤습니다.
다음 포스팅에서 뵙겠습니다.
'[ JAVA ] > JAVA Spring Security' 카테고리의 다른 글
| [ Spring Boot ] Spring Security - 회원가입 및 로그인 (1) | 2023.09.26 |
|---|---|
| [ Spring Boot ] Spring Security - 기본 개념 및 예제 (0) | 2023.09.25 |
| [ Spring Boot ] OAuth2 - NAVER 소셜 로그인 (0) | 2023.06.04 |
| [ Spring Boot ] OAuth2 - Google Cloud 프로젝트 생성 (0) | 2023.06.01 |
| [ Spring ] Security 개념 (0) | 2023.05.30 |