
프로젝트 구조


오늘은 이전 포스팅에서 생성했던 상품 목록 페이지에 기능을 추가하려고 합니다.
추가 기능은 수정/삭제입니다.
product_list
이전 포스팅에서 상품 이름 아래에 관리자 ID값이 들어오면 편집 기능이 표출되게 코드 작업을 했습니다.
그렇다면 해당 태그를 Controller에 요청을 보내는 코드를 작성합니다.
<%@ page language="java" contentType="text/html; charset=UTF-8"
pageEncoding="UTF-8"%>
<!DOCTYPE html>
<html>
<head>
<meta charset="UTF-8">
<title>Insert title here</title>
<%@ include file="../include/header.jsp" %>
</head>
<body>
<%@ include file="../include/menu.jsp" %>
<h2>상품목록</h2>
<table border="1" style="width: 100%;">
<tr>
<th>상품코드</th>
<th> </th>
<th>상품명</th>
<th>가격</th>
</tr>
<c:forEach var="row" items="${list}">
<tr>
<td>${row.product_id}</td>
<td><img src="${path}/images/${row.picture_url}"
width="100px" height="100px"></td>
<td><a href="${path}/shop/product/detail/${row.product_id}">${row.product_name}</a>
<!-- 관리자에게만 편집 버튼 표시 -->
<c:if test="${sessionScope.admin_userid != null }"> <br>
<a href="${path}/shop/product/edit/${row.product_id}">[편집]</a>
</c:if>
</td>
<td><fmt:formatNumber value="${row.price}" pattern="#,###" /></td>
</tr>
</c:forEach>
</table>
</body>
</html>
저는 shop = > productController에 세부 url을 edit으로 설정하고 GET 방식으로 상품 아이디랑 같이 요청을 보냈습니다.
위 코드처럼 URI에 변수가 들어가는걸 실무에서 많이 볼 수 있습니다.
그렇다면 어떻게 처리를 해야 할까??
Controller
URI에 변수 처리할 때는 @PathVariable로 처리할 수 있습니다.
사용법은 메서드 정의에서 위 코드에서 쓴 변수명을 그대로 @PathVariable("변수명") 사용합니다.
목록 리스트에서 호출한 URI는 해당 상품의 상세 페이지를 호출하기 때문에 상품 데이터를 가져오기 위해 Service로 요청을 보내야 합니다.
//edit/6 => edit/{6}
	@RequestMapping("edit/{product_id}")
	public ModelAndView edit(@PathVariable("product_id") int product_id,
			ModelAndView mav) {
		mav.setViewName("shop/product_edit");//이동할 뷰
		mav.addObject("dto", productService.detailProduct(product_id));
		return mav;
	}
그럼 다음으로 Service 에서 요청을 받습니다.
Service
Service 에서는 DAO에 요청을 보내서 세션 처리를 할 수 있게 해 줍니다.
	@Override
	public ProductDTO detailProduct(int product_id) {

		return productDao.detailProduct(product_id);
	}
DAO
DAO에서는 데이터 베이스에 접근해서 값을 가져와야 합니다. 전체 데이터를 가져올 땐 selectList()를 사용하는데,
상세 페이지는 해당 상품의 칼럼 데이터를 가져와야 하기 때문에 selectOne()으로 접근합니다.
	@Override
	public ProductDTO detailProduct(int product_id) {

		return sqlSession.selectOne("product.detail_product", product_id);
	}
mapper.xml
select문은 resultType을 설정을 해줘야 합니다. 상세 목록 페이지는 DTO 타입으로 가져오기 때문에 DTO 파일 경로를 resultType에 설정합니다. (알리아스 설정해서 단축기 설정하셔서 하셔도 됩니다.)
<select id="detail_product" resultType="com.example.spring.model.shop.dto.ProductDTO">
	select * from product
	where product_id= #{product_id}
	</select>
다음으로 Controller에서 설정한 View 단 페이지를 생성합니다.
product_edit
상품 데이터를 View 단에 표출하려면 반환 타입으로 값을 가져올 수 있습니다. 위에서 말씀드린 것처럼 저는 DTO 타입으로 값을 반환할 수 있게 했습니다. 아래 코드를 확인해 봅시다.
<%@ page language="java" contentType="text/html; charset=UTF-8"
    pageEncoding="UTF-8"%>
<!DOCTYPE html>
<html>
<head>
<meta charset="UTF-8">
<title>Insert title here</title>
<%@ include file="../include/header.jsp" %>
<script type="text/javascript">
function product_delete() {
	if(confirm("삭제하시겠습니까?")){
		document.form1.action="${path}/shop/product/delete.do";
		document.form1.submit();
	}
}

function product_update() {
	var product_name=$("#product_name").val();
	var price=$("#price").val();
	var description=$("#description").val();
	if(product_name==""){//빈값이면
		alert("상품이름을 입력하세요");
		$("#product_name").focus();
		return;
	}
	if(price==""){//빈값이면
		alert("가격을 입력하세요");
		$("#price").focus();
		return;
	}
	if(description==""){//빈값이면
		alert("상품설명을 입력하세요");
		$("#description").focus();
		return;
	}
	document.form1.action="${path}/shop/product/update.do";
	document.form1.submit();
}
</script>
</head>
<body>
<%@ include file="../include/admin_menu.jsp" %>
<h2>상품 정보 편집</h2>
<form name="form1" method="post" enctype="multipart/form-data">
<table>
 <tr>
  <td>상품명</td>
  <td> <input name="product_name" id="product_name" value="${dto.product_name}"> </td>
 </tr>
 <tr>
  <td>가격</td>
  <td> <input name="price" id="price" value="${dto.price}"> </td>
 </tr>
 <tr>
  <td>상품설명 </td>
  <td>
   <textarea rows="5" cols="60" name="description" id="description">${dto.description}</textarea>
  </td>
 </tr>
 <tr>
  <td>상품이미지 </td>
  <td>
   <img src="${path}/images/${dto.picture_url}" width="300px" height="300px"> <br>
   <input type="file" name="file1" id="file1"> </td>
 </tr>
 <tr>
  <td colspan="2" align="center">
   <input type="hidden" name="product_id" value="${dto.product_id}">
   <input type="button" value="수정" onclick="product_update()">
   <input type="button" value="삭제" onclick="product_delete()">
   <input type="button" value="목록" onclick="location.href='${path}/admin/list.do'">
  </td>
 </tr>
</table>
</form>

</body>
</html>
그럼 상세 페이지 폼에 데이터가 잘 나오는지 확인해 봅니다.
product_edit

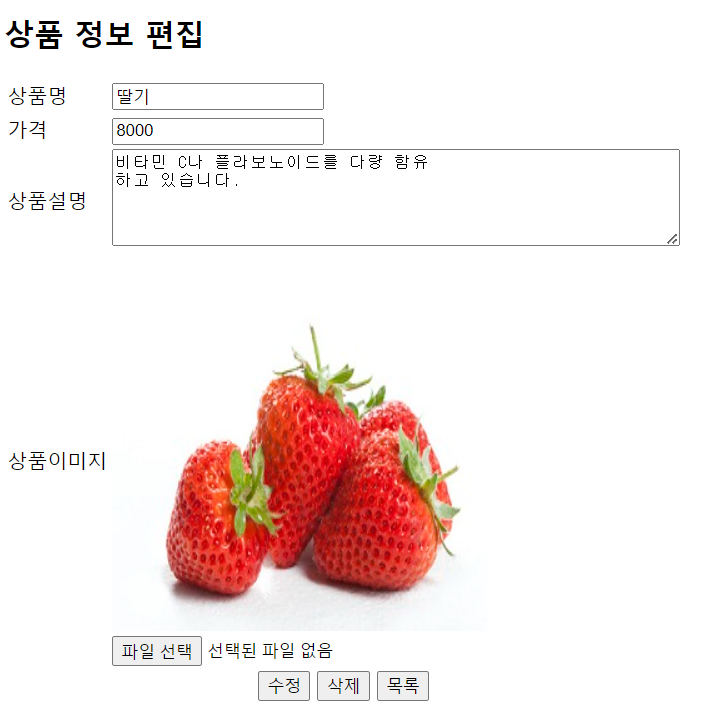
다행히 데이터를 제대로 가져오네요.
다음으로 수정/삭제 기능을 구현합니다.
View단 코드에서 URI 에서 세부 url을 Controller에서 요청을 받습니다.
Controller
상품 수정/삭제를 할 때 꼭 처리해야 하는 부분이 있습니다.
수정을 했을 때 첨부 파일/디렉터리 유/무 처리를 해줘야 하고, 새로운 첨부 파일이 없으면 기존에 첨부한 파일 정보를 가져와야 합니다.
또한 삭제를 했을 땐 첨부파일이 있으면 목록에서 삭제를 해줘야 하고, 레코드도 삭제해야 합니다.
그럼 코드를 확인해 봅시다.
	//상품수정
	@RequestMapping("update.do")
	public String update(ProductDTO dto) {
		String filename="-"; //not null로 했을때 "-"으로 처리 되게함.
		//첨부 파일이 있으면
		if(!dto.getFile1().isEmpty()) {
			//첨부 파일의 이름
			filename=dto.getFile1().getOriginalFilename();
			try {
				//개발디렉토리, 배포디렉토리
				//디렉토리 구분자 : 윈도우즈 \, 유닉스(리눅스) /
				// " "안에다 \를 쓰면 특수무자로 알아듣기 때문에 \를 하나 더 써야함.
				String path="C:\\work\\.metadata\\.plugins\\org.eclipse.wst.server.core"
						+ "\\tmp0\\wtpwebapps\\spring02\\WEB-INF\\views\\images";
				//디렉토리가 존재하지 않으면 생성
				new File(path).mkdir();
				//임시 디렉토리에 저장된 첨부파일을 이동
				dto.getFile1().transferTo(new File(path+filename));
			} catch (Exception e) {
				e.printStackTrace();
			}
			dto.setPicture_url(filename);
		}else {//새로운 첨부 파일이 없을 때
			//기존에 첨부한 파일 정보를 가져옴
			ProductDTO dto2=productService.detailProduct(dto.getProduct_id());
			dto.setPicture_url(dto2.getPicture_url());
		}
		productService.updateProduct(dto);
		return "redirect:/shop/product/list.do";
	}

	@RequestMapping("delete.do")
	public String delete(@RequestParam int product_id) {
		//첨부파일 삭제
		String filename=productService.fileInfo(product_id);
		System.out.println("첨부파일 이름 : "+filename);
		if(filename != null && !filename.equals("-")) {//파일이 있으면
			String path="C:\\work\\.metadata\\.plugins\\org.eclipse.wst.server.core"
					+ "\\tmp0\\wtpwebapps\\spring02\\WEB-INF\\views\\images";
			File f=new File(path+filename);
			System.out.println("파일존재여부 : "+f.exists());
			if(f.exists()) {//파일이 존재하면
				f.delete();//파일 목록 삭제
				System.out.println("삭제되었습니다.");
			}
		}
		//레코드 삭제
		productService.deleteProduct(product_id);
		return "redirect:/shop/product/list.do";
	}

}
그다음엔 흐름대로 Service에서 DAO로 요청을 보냅니다.
Service
	@Override
	public void updateProduct(ProductDTO dto) {
		productDao.updateProduct(dto);

	}

	@Override
	public void deleteProduct(int product_id) {
		productDao.deleteProduct(product_id);

	}
DAO
요청 기능에 맞게 수정은 update(), 삭제 delete()로 DB에 접근합니다.
	@Override
	public void updateProduct(ProductDTO dto) {
		sqlSession.update("product.update_product", dto);

	}

	@Override
	public void deleteProduct(int product_id) {
		sqlSession.delete("product.product_delete", product_id);

	}
mapper.xml
	<update id="update_product">
	update product
	set product_name =#{product_name},price=#{price},description=#{description},
	picture_url=#{picture_url}
	where product_id=#{product_id}
	</update>

	<!-- 첨부파일 이름 -->
	<select id="fileInfo" resultType="String">
	select picture_url from product
	where product_id = #{product_id}
	</select>

	<!-- 상품 레코드 삭제 -->
	<delete id="product_delete">
	delete from product
	where product_id = #{product_id}
	</delete>
마치며
오늘은 수정/삭제 기능에 대해서 포스팅해 보았습니다.
다음 포스팅에서 뵙겠습니다.
'[ JAVA ] > JAVA Spring' 카테고리의 다른 글
| [ Spring ] 코드 난독화 (1) | 2023.04.19 |
|---|---|
| [ Spring ] Interceptor (0) | 2023.04.17 |
| [ Spring ] 상품 등록/목록 페이지 구현 (0) | 2023.04.13 |
| [ Spring ] 관리자 페이지 목록 구현 (1) | 2023.04.12 |
| [ Spring ] 장바구니 기능 구현 (1) | 2023.04.11 |